Showing posts with label MPB Shirt Sew Along; McCall's 2447. Show all posts

Sunday, March 06, 2011

MPB Shirt Sew Along ~ Muslin Preparation

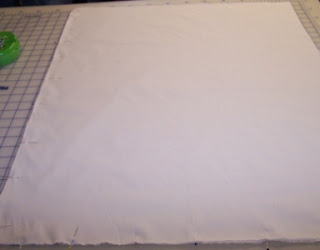
My DH is traveling a lot, so his making of a shirt is going to be a slow process because of that and the learning curve.  We did make some progress this weekend.  I started with instructing him about straight of grain, crossgrain, and the bias of fabric.  I had him tear his muslin fabric to get a straight edge and pin the torn edge and the salvage edge.  The fabric looks a mess.  You can see it needs a good pressing, but you can also see how it is twisted, out of shape.


He steamed and pressed the fabric and got it looking straight again.  I explained that if he doesn't take the time to do this, by the end of a day, his shirt will end up twisting no matter how much he has the cleaners press the shirt.  It's ready to put the pattern pieces on. 


My DH spent considerable time cutting out the pattern.  I had him use weights and a rotary cutter.  I forgot to warn him about the dangers of a rotary cutter.  My thoughts were that as a wookworker he would know, since he uses razor blades all the time.  He tried to guide the cutter with his finger and managed to take a tiny, tiny bit of skin off.  Ouch!  I believe people learn from their own mistakes.  He did.  I had to show him the safety button even though his drill has the same kind of thing.  Association is not always evident. 
He did an awesome job with the pieces ~ took his time and did the process with accuracy. 


I am not going to have him make a complete shirt out of the muslin, but I am going to have him do the sleeve placket completely for practice.  It's intimidating looking, but they do go together quite nicely.

Tuesday, February 08, 2011

MPB Shirt Sew Along - Week 1

My DH found himself the perfect classic dress shirt pattern.


It has all the important features that he's particular about ~ front band, collar stand, collar stay.  I explained that if he can master this pattern, anything after this will be easy.

He narrowed down the fabric choices to this white/lavendar stripe.


This small stripe won't be difficult for him to work with.  It will actually help in locating the straight of grain.  It was washed/ironed and is ready, but I am having him make a muslin first.

My DH spent a few days reading sections of Shirtmaking by David Page Coffin and a 1926 edition of Tailored Garments by Woman's Institute of Domestic Arts and Sciences on tailored shirts.  I did research on wearing ease for a man's shirt.  Scott R Robinson, Designer and Instructor in Theater Arts at Central Washington University states that a classic shirt should have 3" of wearing ease at the chest.  A fitted shirt should have 1 1/2" - 2 1/2" inches of wearing ease.  I took DH's measurements after I had him watch this video.  Never even thought about the watch.

Since my DH feels this pattern is so nice, I had him preserve it by having him trace each piece instead of using the originals.  I put the cutting table near his work bench, so he would feel more confortable.  At first, he did a lot of complaining about having to trace the pattern.  Something like, it would be cheaper to buy a new pattern than use up his time.  Blah, blah, blah!  I had him iron each original pattern piece, and showed him how easy it is to trace.  That you don't have to mark everything.  So we proceed to trace the large pieces together.  I went on to do other things and came back to this.


What an amazing job!  A little obsessive, but amazing.  If he keeps this up, he is going to have one beautiful shirt.  Each pattern piece is now cut ready for the muslin fabric.